Sunday, October 2, 2016

Crochet - A Baby Blanket on Pause

When Daisy, my future sister-in-law, got pregnant with her daughter, I vowed to make a baby blanket for the child.  Fortunately we found out that she was expecting a girl, so I set out to make a lovely. A lovely is a doll blanket. The center is usually a doll head (with or without arms) with the actual blanket as the doll's torso and bottom. 
There was a princess pattern I had been eyeing on Ravelry, a free knitting and crocheting website.  I chose this pattern because Disney princess are deeply cultural for us Americans. They are simply iconic and even though the younger generation of children only know the newer princesses, they are still able to recognize the classics: Snow White, Sleeping Beauty, and Cinderella. Cinderella is Daisy's favorite princess, so I researched as many images of Cinderella as I could to find my template for the lovely.

I picked the princess pattern by Briana Olsen (pictured in the center above)  because she included ways to adapt the pattern for each princess.  She included hair customizations and patterns for crowns and wings.  Hers is so comprehensive and universal that I can continue to use the pattern over and over again for many different figures.

Once the pattern was chosen, I created a project page on Ravelry.  Ravelry doesn't simply have patterns.  Ravelry allows every user to sell, buy, or give away free patterns and also allows every user to queue patterns for a later time and create project pages to track the progress.  Here is mine for the Cinderella Lovey


It's difficult to see, but there is a list of materials in the center and a progress bar in the upper right corner.  In that same location, there is a status and a start date.  My start date is April 20, 2015.  It's almost been a year, but my blanket is only 70% finished.  A part of the reason why the blanket is unfinished is that I lost steam.  I have a tendency to start off a project really strong, then fizzle out and die towards the middle.  At least for this project, I made it through the halfway point!  The other reason why is...I hate finishing up knitting/crocheting projects.  Finishing involves a lot of sewing and hiding the loose ends and oh man..I HATE THAT PART.

I also have to block the blanket.  Blocking is a process where you use water to shape a project so that it looks the way it is supposed to.  With most circular projects (knitting and crocheting), there is a scrunched and misshapen look in the finished projects.  Blocking softens the yarn so that it can be shaped into the proper form.  Corners are pointier; edges are straighter, and patterns are better highlighted.  Blocking requires wetting the project in some way so that in it's wet state, it can be shaped.  There are many processes out there.  I use a process called wetblocking.  Maybe I'll go over the different kinds one day when 1) people other than my fiancé finally start reading my blog 2) those people want me to go over the different kinds of blocking.

Here are some pictures of the individual, unfinished parts
In the above picture, you can see that there are the end strings hanging off and the edges of the blanket are curled.  Blocking will make those edges flat and straight and make the corners pointy.
The hair and bun....
I love the color of the hair.  It's a warm gold and it reminds me of a sunset over a meadow.

I started off this post with the intention of just writing about an unfinished project.  Yet, pulling out the different parts and taking pictures made me realize just how much I miss knitting and crocheting.  Also, I keep on thinking of baby Addison, my adorable to-be niece.  I get so happy just looking at that golden hair; I want her to share in that joy.  Also, she's 6.5 months.  This gift is 6.5 months late.  Now yes, she is only now developing depth perception, learning to really look at objects as a whole, and recognizing softer colors, but I want her to have this lovey.  This lovey will be a blanket, a doll, and her best friend.

No pressure on Addison, but I picture this lovey as her baby blanket.  You know, the one that she'll bring everywhere and won't be able to sleep without.  Her blankie.  Ok! I'm motivated to finish this and finally gift it!  It is currently April.  My goal is to have this gifted in May :)

Links to Patterns, Blogs, and Supplies:
Teddy Bear Lovey - Carolina Guzman
Pretty Princes Lovey - Briana Olsen
Mini Hippo Lovey - Lorraine Pistorio
Knit Picks - Billow (in Clarity, Natural, and Cornmeal)

Friday, September 16, 2016

EXCITING NEWS!


If you recognize this logo, then you're going to realize that I hit the jackpot! Amber Labau is a physical and digital scrapbook designer who is super talented. As some of you already know, designers put together groups of people to create with their products. These groups are called creative teams. So, Amber Labau put out a creative team call for her digital products a few weeks ago and on an impulse, I signed up. AND SHE PICKED ME! I was actually really surprised. Like, WOW! I'm an ok Project Lifer, and when it comes to scrapbooking, I almost exclusively scraplift. BUT SHE PICKED ME! YAAAAAAAYYYYYYYY!!!!
Here is the full list of the team:
Amber added us all to her group on Facebook, and oh man, EVERYONE IS SO NICE! And creative! And supportive! I have to admit, I am having a great time and that means a lot because this is my first creative team. I hope you check out Amber's work at The Lilypad and her blog. If you go on her website, you're able to access the work of everyone on her creative team. When you do though, I have to warn you...you'll need a moment to prepare for awesomeness :)

The most recent collection to come out is Amber's Brave New World.


As you can see, it's just so pretty. So so pretty! It's so soft, sweet, and amazingly versatile! I wrote down a whole bunch of ideas for this collection and not all are baby related. This is a kit that I'm going to come back to, over and over again. What's great is that while I'm using this kit for non-baby purposes now, if I have a baby in the future, I can use it then too :)

To show how great this collection is, here is a project life spread I put together:


Oh come on! Everything is just so great! Ok, before we continue, I need to say something about this spread. This was put together digitally on photoshop. Everything was put together with cutting and pasting on CS4 and there were no physical products that touched my hands. Until I printed the individual cards and put them into plastic page protectors.


This is how everything looks in the physical form. Definitely taking pictures of project life and scrapbook spreads lowers the quality of the work. However, I love the physical form of memory keeping and I can't ever give it up :D

One more spread to show: 


The left side:


And the right side:


While I am showing you the physical version of this spread, I put together most of it digitally, printed out the pictures and cards, then added a few embellishments here and there. This spread was put together using Amber's Outer Limits collection. Again, so versatile! This collection is about space, but I was able to adapt it to my fiancé and his nephew reading a train book together. 

So, when you have the chance, please congratulate me :) Then go check out Amber's blog and store at The Lilypad! You'll get to see her great stuff, and the work of far more talented people. I am so thankful to have been chosen for this team and I can't wait to grow with and learn from everyone!

Supplies Used:
Brave New World - Amber Labau
Outer Limits Papers - Amber Labau
Outer Limits Elements - Amber Labau
Tiny Attacher - Tim Holtz
Puffy Stars - Studio Calico
Page Protector 2A - Studio Calico
Page Protector 4A - Studio Calico

Sunday, September 4, 2016

A Gift


All memory keepers know, September 1st was a monumental day this year. This was the day Ali Edwards opened the ordering process for this year's December Daily products. Registration opened at 8am PT, which is 11am here in ET. I tried to go onto the product website http://decemberdaily.com at 11:15am. I couldn't, because we had broken the internet. There were literally hundreds of us trying to access the products and order before items sold out. Ali Edwards and her team were amazing. They got the site up and running to handle the traffic as soon as they could. When products sold out too quickly, they notified us on what items could and couldn't be restocked and made adjustments to accommodate demands. Too good. I got to order my "essentials" and I am very satisfied.

Her marketing was top notch too. All throughout the week before the order process opened, new guest designers were introduced with sneak peeks of their kits. When September 1st rolled around, we were like rabid dogs ready for the kill. The marketing also motivated many of us to work on 2015's December Daily. Working on my DD seemed a little to challenging, but I remembered that Nayoung, my best friend, never got to put hers together either. So, to ease into my DD, I decided to put an album together for her. That way she can just print pictures, slip them into the pockets, journal, then lightly embellish. 

Oh, I'm sorry. I forgot to explain what December Daily is!

Here is the website: http://aliedwards.com/projects/december-daily. Now that you have the website, go on and read up on it. JUST KIDDING! 

This projects is like the memory keeping form of an advent calendar. You document every day of December and you can either document the first 25 days, or the month in its entirety. While most choose to stop at Christmas, I go up to the end. It just seems more consistent to document ALL the days of December. It might also be because I don't view December in the same way that others do. 

Yes, as a Christian, Christmas is a very special holiday. We celebrate the birth of Jesus. I celebrate the event wholeheartedly, but I celebrate the day cautiously. The history of December 25th is very nonChristian. I understand how and why we celebrate on the 25th, but the day itself is of no importance to me. 

Plus, I love December 1-24. The anticipation that the majority of the world shares in is so relatable, and so symbolic. It brings me back to the anticipation of the Israelites at the end of the Old and the beginning of the New Testament. God's people were waiting. They were waiting for God to be with them again. They were waiting to hear His voice again. They were waiting for God to come through on His promise. They were waiting to be saved. While the world yearns for something different (like gifts, vacation, family time, etc.), we all yearn together and this corporate yearning is like a time machine. 

Christians, we continue to yearn. We're waiting for Jesus to come again! Whether it be in our lifetime or not, we are waiting for the full redemption of all creation. All of the good and all of the bad in our lives culminates in this last month of the year and it becomes unbearable. So we yearn. We yearn, for the joy that we know here is just a glimpse of true and eternal joy. We yearn for the real thing. We yearn because the pain and suffering is just too much. We throw our hands up and our hearts cry out for the fulfillment of God's promise in Christ Jesus. 

I absolutely love December 26-31. Jesus's time on earth was groundbreaking. He was the ultimate activist. He was a feminist, and He broke racial barriers. Then, He broke the barrier between Heaven and Earth to bring unholy sinners before God, the Father. The only perfect person to have walked and will walk the Earth, Jesus, the God-Man Himself, was broken to save us from the eternal death.

So, what I'm trying to say in these four paragraphs is that ALL of December is important to me in relation to the life and eternity of Jesus Christ.


So, Nayoung's Album. Last year, I picked up the 4x6 Merry Merry Album for her. The 6x8 version sold out so quickly that I decided to get this one. It's small and not intimidating for a newcomer. While I originally intended for her to put the album together herself, she's all the way in Pennsylvania and I'm here in New York. I wasn't able to lug ALL of my DD supplies over, nor was she able to come over for a long weekend. For the hardcore Ali Edwards fan, you'll recognize the 2015 Main Kit scattered all over my desk. This was actually not my main go to kit. I predominantly used Peppermint Granberg's and Jasmine Jones' 2015 minikits. I wanted something clean and pretty for Nayoung instead of a classic look. The 2015 minikits were heavy on paper and sparse on embellishments so I relied on the main kit for embellishments. 


Ugh, that cover is just so pretty. The classic red with the white script just makes me light up. For the inside cover, I heat embossed a star pattern from Jasmine Jones' 2015 set. Ummmm, I'm going to go for a larger pattern next time. The result is pretty, but it took a while. You can see where I start to get sloppy and I even burned a part of the spine. OOPS! Nayoung, if you read this, I burnt it with my love ;) Ali Edwards had a Christmas in July sale so I picked up a few of those gold circle transparencies. I love those and I am going to horde them FOREVER. The inner title page has a wooden veneer star and a rubber banner that says "remember this." I find this sentiment so important. There are so many things we "should" remember, but we don't. I wanted to remind my best friend that there are so many good things to remember and that she MUST remember. That banner is not just a reminder; it's an imperative


Next is the intentions page with the heading "Bring on the Magic." I wrote a whole bunch of suggestions throughout the album. I want to ease her into this project instead of dumping it on her. She doesn't have to take any of these suggestions, but she can fall back on them if she needs extra inspiration. The red number "1" is from a Stocking Stuffer from Scraptastic Club.


The number "3" card is from Ashley Goldberg's 2015 minikit. All of her 3x4 cards from the kit have gold foil and they can definitely be used outside of Christmas/winter time. The small chipboard "four" is from Peppermint Granberg's 2015 minikit. They are so teeny tiny that they can be put anywhere! The number "5" sticker is from Shimmelle's "Christmas Magic" collection. I stuck these stickers to the outside of the page protector so that Nayoung could easily reposition them. I did the same with the chipboard "four." I tried to keep these numbers loose in case she doesn't like what I did with them. This is going to be HER album filled with HER memories.


I used to subscribe to A Beautiful Mess' Messy Box and this tree transparency came in their December 2015 kit. I cut it down to 4x6 and punched holes to stick it directly into the album.


More cards, numbers, and suggestions...


I added a red label sticker to day 11. I left it loose as well so that Nayoung could position it the way she wants. Also, if she's anything like me, it's just safer to write on unattached labels. I have a tendency to mess up hahahahaha. The "11" tag is from Ali Edward's 2015 main kit. I used the gold washi tape from the same kit to decorate the bottom. Some suggestions on what to do with the tag.


I cut a vellum with triangle and added a tab that says "noel." I love that adorable gingerbread cookie card from Kelly Purkey. So so so cute! 


I also cut up some 6x8 papers from the kits to 4x6 or 3x4. I picked ones that had subtle backgrounds that could be used as stand alone cards or as photo mats. For day 16, I included a strip of paper 6inches long. I created it using a silkscreen from ABM's June 2015 Messy Box. Sometimes, the bottom sections of photos can be super busy and distracting. This strip of paper is to cover that up.


I backed the "19" tag with a paper of star sequins. It's such a pretty paper! Cozy and pretty :) Oh, there's also a label sticker there.


I thought I'd do something different for December 20th. I used a calendar card and marked the date with an enamel star. I paid attention to Sundays, church days, and tried to make those days extra special. 


I appreciate that Jasmine Jones included Christian themes and verses in her kit. I find that lacking this year in the 2016 kits. I'm going to have to look for a Christian geared kit to supplement this year's main kit. Day 24 gets a vellum tag for Nayoung to decorate as she wishes~~ And day 25! I included a pocket from Gossamer Blue's 2014 December Memories Get Happy Kit. I got that kit through a warehouse box sale that was overflowing with goodies. If you want it, go get it!


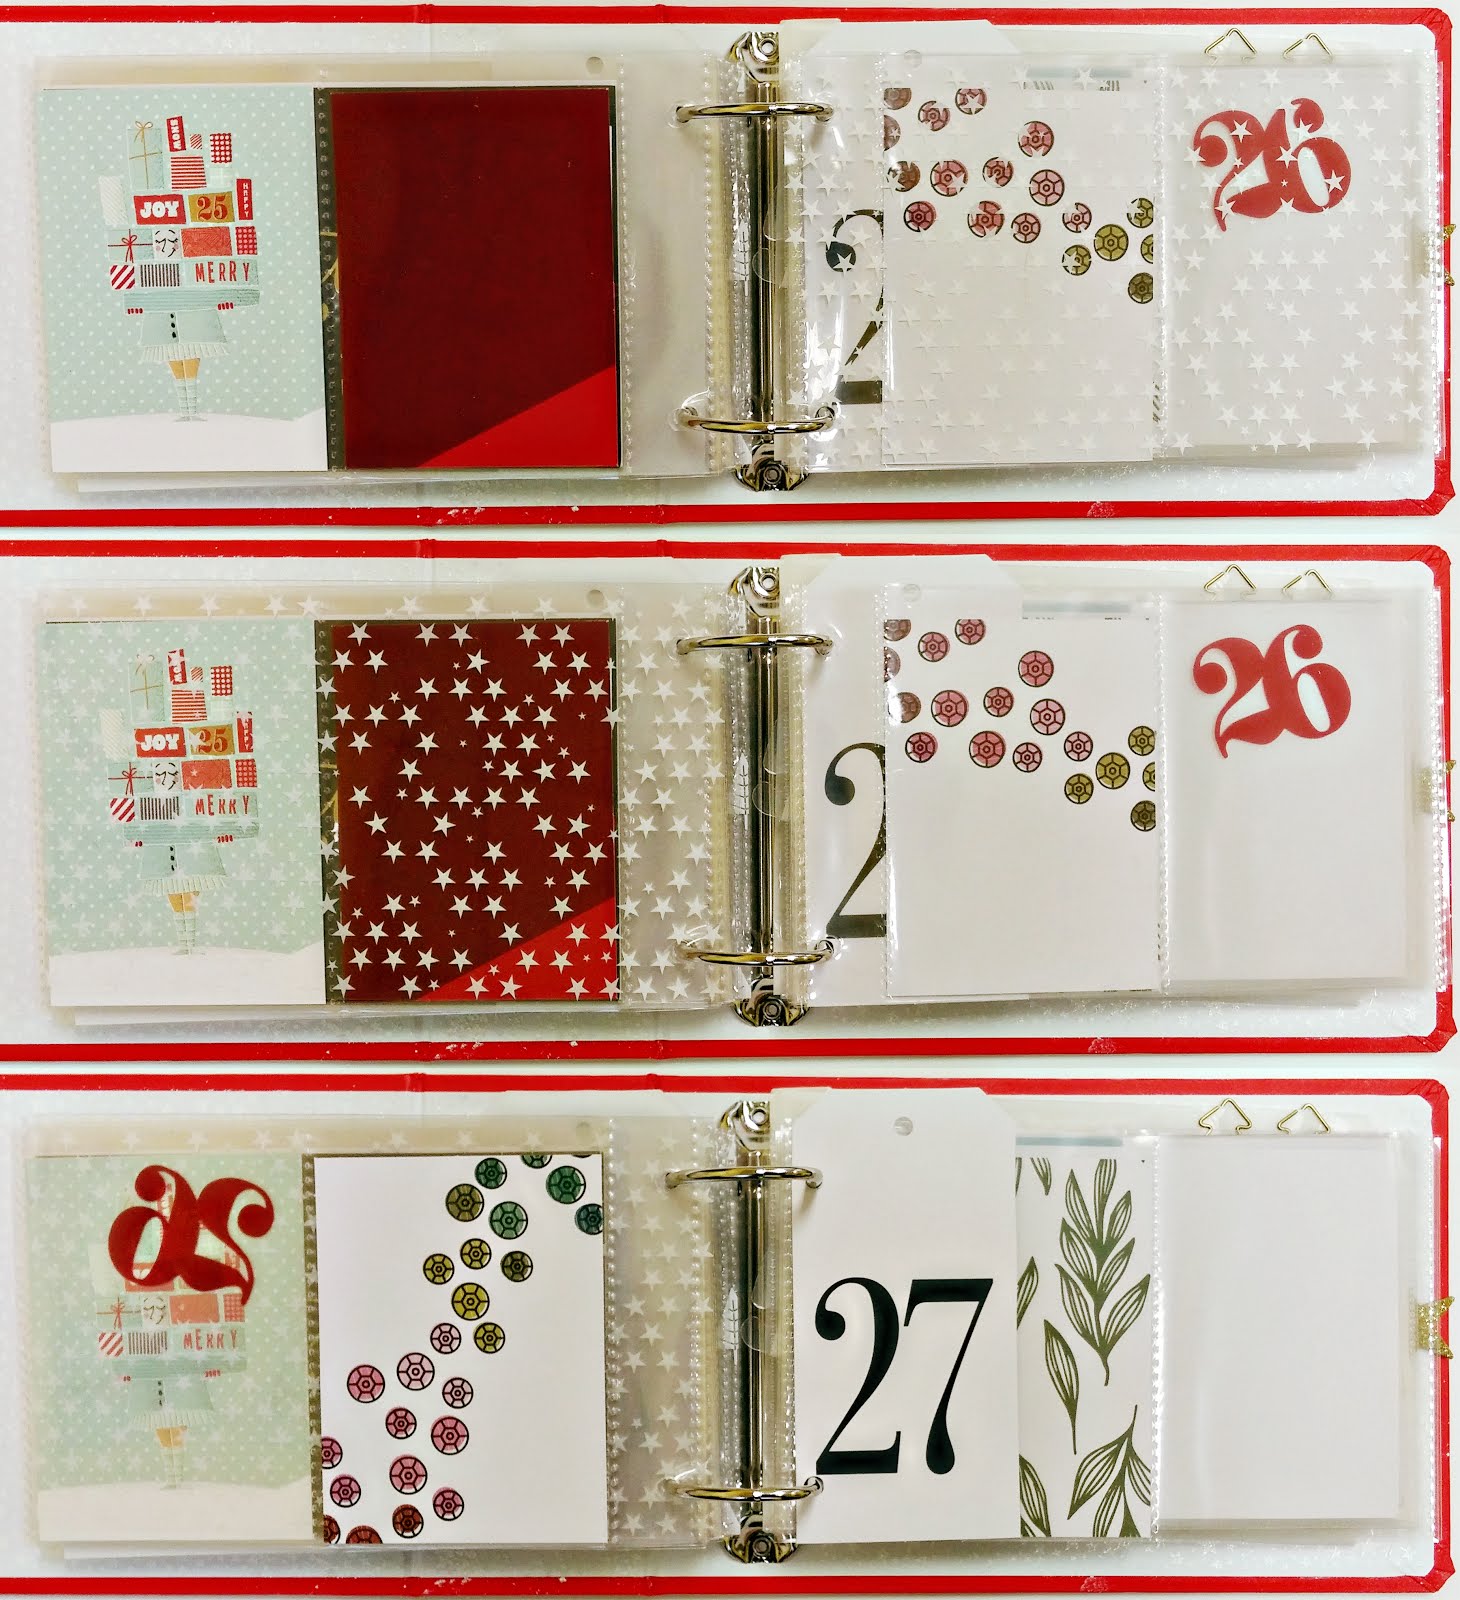
Christmas is usually filled with many memories and pictures, so the 25th gots two spreads. Also, it got a star transparency.


I used a silkscreen from the 2015 main kit and gold acrylic paint to jazz up the plain back of the "27" tag.


The last few pages of the album. The "let it snow" card is from one of Kelly Purkey's OLD kits. I got it on a Black Friday Sale. 


At the end here, I included a whole bunch of extra things. There are a bunch of extra cards from Messy Boxes, Ali Edwards, Kelly Purkey, and Studio Calico. The cat is a washi tape holder. I wanted Nayoung to have a variety of washi tape so I picked three cute ones. Yes, I intentionally placed the skinny red one to look like a gym headband hahahaha. I added a bunch of embellishments from minikits, past main kits,and Messy Boxes. I hope I included enough!

I had a lot of fun putting it together. I felt a lot of pressure at first because thoughts such as "what if she doesn't like this card?" or "she might not be able to relate to this quote on the card..." or "she might hate so much gold" (ppffffftt who hates gold?) kept running through my head. But I realized that if she doesn't like something, SHE DOESN'T HAVE TO USE IT. If she can't relate to something, THEN SHE DOESN'T HAVE TO USE THE CARD. If she doesn't like that much gold, PFFFTTT LIKE THAT'LL EVER HAPPEN! So I just started adding in cards and papers that I thought were pretty.

This album is a part of a larger box that I'll be gifting her. I put more alphas, Ali Edwards Story Kits, stamps, stickers, and other things in the box. I also wrote her a long letter just to say "hi" and to get her started on photo printing. I hope she likes it AAAALLLLLLLLLL. If she doesn't, then that's ok. She'll always be my best friend :)

Supplies Used:
4x6 Merry Album - Jasmine Jones
2015 Main Kit, 2014 Main Kit, 2013 Main Kit - Ali Edwards
2015 MiniKit - Jasmine Jones
2015 MiniKit - Peppermint Granberg
2015 MiniKit - Kelly Purkey
Starlight Alpha - Shimmelle's Magic Christmas
Specialty Winter Card Set - Life Love Paper for Studio Calico
Young At Heart Planner Kit - Studio Calico
Star Transparency - Ali Edwards
Messy Box - A Beautiful Mess

Saturday, May 14, 2016

Memory Keeping - Anniversary Minibook - 1YR Batch 3


Here is Batch 3 of my 1year anniversary.  Batch 3 takes FOREVER!  It's the stage where I constantly repeat my life mantra "good enough."  While this mantra isn't exactly the best for my life, it works for Project Life.  Since I struggle with the creative, play aspect, I second guess every little thing that I do.  Does this enamel dot look good here or 0.1mm to the right?  Does the "love you" or the "❤ you" stamp look better?  When I look back at these sessions of second, third, fourth, thousandth-guessing, I want to smack past-me on the head and scream, "IT MAKES NO DIFFERENCE!"  It actually doesn't.  The products are not the focus of this project.  My skills are not the focus of this project.  That's because my lack of creativity will never take away from the moments and emotions captured in these photos.  My insufficiency can never take away from the memories.  So I stick with "good enough."

When Andy (my fiancé) looks through our albums, he doesn't linger on the aesthetics.  He reads the journaling and looks at the photos.  He thinks back to these times and goes, "Oh yeah! I said that! I'm funny 😝"  In the different PL groups on Facebook, the posts that make us put our hands to our hearts and feel rewarded are the posts about family members looking through the Project Life albums and enjoying the past memories.

So I push through Batch 3 to get the spreads done.  It's better to record the memories instead of having shallow, gorgeous pages.  Don't get me wrong! There are people who can beautifully record memories.  These people are so so so talented and I am incredibly jealous of them!  I want to grow to do this.  But until then, GOOD ENOUGH!

I wanted to try out something new on a few photos.  Ali Edwards often includes word strips in her story kits.  In her layouts she stacks multiple strips on her photos.  It's a way to use up the products while drawing the eye across the page.  So I tried it out.  I don't quite know how I like it yet.  Only time will tell.


Again, skipping over this first page for now.  I promise to write a post on how I scraplifted this layout. 


On this second spread, I added a chipboard "1" from Ali Edwards' Tough story kit to the food picture.  The kit comes with numbers 1-5.  This is perfect because I originally organized my photos from this day into 5 major sections.  So our first stop gets the first number.  On the full sized photo I added some word strips, the new thing that I'm trying out.  I think it looks ok!


This third spread is from Target (obvi~) and since it's our second stop of the day, I added the number 2 chipboard to the red polka dot card on the lower right card.  Honestly, this card REALLY bugs me.  I couldn't center the circle correctly and it's just so off to the right.  I tried to fix it, but there is residue on the card from the sticker so I decided to leave it.  Good enough right?  I also added journaling onto the Together card.  More word strips onto the two photos on the right side of the spread.  I love the ones that came with the AE Wild Story Kit, especially the "I'll keep you wild."  It perfectly describes our relationship.  I'm weird (as you can tell from the photos) and he is....weird too, just good at hiding it.  So I love these moments where I do something he secretly wants to and he says, "you look so stupid," because that's code for "I love you."


For spread four, I journaled on the Magic card and added a circle die cut from Pink Paislee's Atlas collection.  I also added a transparency from the same collection onto the lower right card.  It looks pretty cool because the arrow is parallel to the shoreline.  I taped it onto the page protector instead of onto the photo because I thought the tape might show through and I didn't want to mess up the photo.  It's actually not that obvious so I'm keeping it the way it is.  A wood veneer on the upper right photo.


Spread five is a reflection spread.  Onto a journaling card from Ali Edward's Wild Story Kit (still available here), I reflected on the beauty of God's creation.  Maybe when I go back to this place, I'll write a more comprehensive piece.  For now, I'm satisfied with just a short blurb.  I tried something that I learned from Ali Edwards' class content that comes with the kit subscription.  I stamped a phrase with VersaMark ink and heat embossed with Zing! embossing powder.  It came out too heavy on the right side, but it's good enough.  After I keep on practicing this technique, I'll get the right pressure.  There's also the chipboard 3.


I didn't do much to spread 6 Pt. A because I embellished and journaled in it in the previous batch.


Spread six pt. B has a label on one of the pictures.  You know, all the other couples don't care about who they PDA (publicly display affection) in front of.  As a New Yorker, I see people making out and groping one another ALL THE TIME.  There are so many viral pictures of public inappropriate conduct.  Andy wouldn't take a quick-kiss picture because some dude was fishing near us.  😑
So I took a pouting picture.  Good enough.


I added the chipboard 4 to spread 7.  I tried out something new here.  I printed a circular digital stamp onto vellum and punched it out with a 1.5in circle punch.  It looks pretty cool because you can still see the blue and the words under it.  I also stamped "we loved this" onto vellum and added that to the picture of the restaurant.  The bottom right photo has the name of the restaurant we went to.  Again, I added a word strip.  Again, THIS RESTAURANT IS AWESOME!  


Spread 8 has journaling on the ledger card and a wood veneer that says "love it here."  The coaster is taped down onto the OLD/NEW card.  I added the chipboard 5 for our fifth and last stop.  I then added a "let us celebrate" wood veneer because this entire day was for our 1year anniversary.  


Spread 9 is the ending spread.  I love the card on the lower left.  "Tell me, what is it you plan to do with your one wild and precious life?" - Mary Oliver.  It's a difficult question.  As humans, there are so many things that we want to do.  A lot of these things are self-centered, but not necessarily selfish.  Some of these things are others-centered, and selfish.  One of the key places that we see this is in relationships.  For the other person, whether it be our significant others, friends, or family, we have a fierce desire to love.  We confuse how to do that.  Instead of understanding that love is action, we think it's emotion.  Honestly, the emotion doesn't do crap for us most of the time, especially when it matters.  That emotion deludes us into thinking that relationships are real and substantial.  But the emotion ebbs and flows.  It's the most unstable foundation any relationship can be built on.  So relationships based on it will ebb and flow.  Ultimately, the emotion is self serving.  The false reality, false substantiality, provides false stability.  

Relationships based on action are hard.  Something that I struggle with everyday is making sure that Andy is NOT the center of my life.  My life has a different center, a different King.  If I'm not on my guard, He gets displaced.  I want to spend my life serving my one true love, Jesus Christ my King.  Andy will be my life partner in that goal.  That "thank you" wood veneer is directed to Andy for planning such a wonderful day, but also to God, for Andy, but mainly for His grace, mercy, and sacrifice.

So!  My 1year is FINISHED!!! YAYAYAYAYAY :)
I'm really glad that I got this very special memory documented.  This is mainly due to the class that I'm taking over at Studio Calico.  The challenges and the timing of the lessons helped me push through each batch.  There's something so satisfying about having my memories documented.  It comes from knowing that in a few years from now, when I need to refresh my memories, I can just pull out my gold anniversary album and walk down memory lane.  Thanks for sticking with me through my process and I hope to upload more projects soon.

Supplies Used:
AE Story Kit (Wild, Tough, Gather, First, Heart) - Ali Edwards
Atlas (Die Cuts) - Pink Paislee
Watermark Ink - VersaMark
New Adventures - Kelly Purkey

Wednesday, May 4, 2016

Memory Keeping - Anniversary Minibook - 1YR Batch 2


I am back with Batch 2 of my 1year anniversary!  As I stated in the previous post (Batch 1), Batch 2 is filling in any blank spots with journaling and filler cards.  This part of my process is both easy and difficult.  The easy part of this batch is that you only have two choices here, a journaling card or a filler card.  Depending on how many empty slots there and whether I already journaled on some pictures or not, I easily know what I need.  The difficult part is finding "that" card.  The one card that has the right color(s) to complement the photos, or the filler card with just the right quote or image to capture the mood of the layout, or the single unique card that doesn't have an awesome backside that can be covered up with a photo on the opposite side.  You know, THAT CARD!  

I've always struggled with this.  This rule that I have to find the perfect card, every time, is a made up and self imposed rule.  So this time, I made a list of possible kits to use.  By limiting myself, I was able to take a lot of the pressure off of myself.  I already had a lot of digital cards from In A Creative Bubble, Studio Calico, and Christine Herrin printed out and a grab bag from Kelly Purkey.  I decided to mainly stick to these cards because, well, they're literally just on my desk.  Instead of having these fun and well designed cards clutter my desk for the "perfect" day, it seemed better to use them to complement the memories that I hold so dear to me.  With this overall mindset of putting less pressure on myself and finding the memories more important than these cards, things came easier to me.  I got into a flow and had most of my cards picked within the same day of printing my photos.  It was liberating!

So here is my Batch 2.  Last time, I gave a little blurb for each spread, so this time I'll only talk about the cards.


I took the digital layout of my opening page and physically recreated it.  Not too much about this page because there will be a separate post :)


Here I filled the 3x4 pocket with Christine Herrin's subscriber freebie: Favorites. 


The upper left card is from In A Creative Bubble's XOXO journaling cards.  The lower right card is from Kelly Purkey.  The card was originally all red with white polka dots, but I cut off a part of it and taped white cardstock under it.  It was too strong with all the red from Target.  Now that it's less intense, I think the card works better and it has more of a balancing effect.  Plus, the polka dots match the Target logo!


Both cards are from Kelly Purkey's grab bag of past kits.  I'll be adding in my journaling and embellishing in a later step.


I absolutely love the 4x6 Made with Love card.  It's from the Ali Edwards' Craft Story Kit.  It's a past kit so it's no longer for purchase.  However, Ali Edwards does occasionally put past kits on sale, so, let's keep an eye out ;)


The transparency squares that read "cool" and "new" are from Studio Calico's Canal Street Add-on (embellishment).  The only journaling that I have done is for these two spreads because I COULDN'T WAIT TO FILL UP THE POCKETS!  I always feel pressured when using this particular page protector because  I don't really know how to fill up the pockets.  So I took a leaf out of the pages of my class instructor, Stephanie Bryan:
http://www.studiocalico.com/galleries/186537-february-2016
I love how she included the journaling by adding the little rectangles with the enamel stickers.  So, I did it too :)


The tab is from Illustrated Faith and the front side reads "more of You" and the back side reads "less of me."  The 4x6 card is from Studio Calico's Homespun Adventure (digital).


I don't like adding too many filler cards, but I typed my journaling onto the bottom left photo so I had extra room.  The "Imperfect" card is from In A Creative Bubble's You Got This journaling cards and the blue "Love" is from the XOXO journaling cards.  The "Best Meal" card is another of Christine Herrin's subscriber freebies.  


The upper left ledger card is from Kelly Purkey's grab bag and the "New/Old" card is from Ali Edwards' Old+New Story Kit.  While the saying doesn't really relate to the story, I liked the way the pattern wasn't too bold and the coaster from the restaurant stood out against it.  I had a really hard time picking the card for this spot.  I auditioned so many different ones.  So many!  But I remembered my new attitude towards this batch and I just went ahead and picked this card.  The tree card is from Ali Edwards' Wild Story Kit.  I think it goes well with the rustic feel of this spread.


The last page has two dark pictures so I wanted to contrast them with two light cards.  The quote card is the backside of the tree card from the previous spread so that worked out, and the card in the upper right is from In A Creative Bubble's XOXO journaling cards.  This one doesn't quite show up well in the pictures.

Oh! So, all of the pictures have light streaks and a hazy look to them.  That's because I scanned the spreads onto my computer.  It's been rainy and cloudy here in the NYC.  I also live right next to a cemetery, meaning that there a lot of trees right outside my window.  I don't get a lot of light into my apartment.  Unless I can find a way to take decent pictures of my spreads, this will have to be my main method of uploading my spreads.

Now that Batch 2 is finished, I will be moving onto Batch 3: journaling and embellishing.  Batch 3 is even harder than Batch 2!  When does a spread need a little extra something somthing?  When is a spread over embellished?  WHEN DO YOU STOP WITH THE PRETTY THINGS?  Also, there are so many pretty things that come in the kits for Studio Calico and Ali Edwards.  I don't know how to use most of them.  I want to use them, I really do.  But I don't have that creative or artistic element.  I don't get that hit of inspiration or novelty.  Every fiber of my being wants to use these amazing bits and bobbities.  I just don't know how.  So...I just copy other people :) Problem solved!

Supplies Used:
Gold 6x8 Album - BH Project Life
6x8 Page Protector Design 1 - BH Project Life (Out of Stock)
6x8 Page Protector Design 2 - BH Project Life
6x8 Page Protector Design 3 - BH Project Life
6x8 Page Protector Design 4 - BH Project Life
6x8 Page Protector Insta Size - Simples Stories
You Got This Journaling Cards - IACB
XOXO Journaling Cards - IACB
Illustrated Faith
AE Story Kits (Wild, Tough, Craft, Old+New) - Ali Edwards
Carolina Moon Scrapbook Kit (Enamel Dots) - Studio Calico
Canal Street (Transparencies) - Studio Calico
Homespun Adventure - Studio Calico